
Hi Guys, welcome to part 26. Firstly, sorry for the long delay in getting this part out, life has been very busy. In the last part we sorted out our ship building UI so we can add ships to the build cue on our one and only star base (so far) and remove them again. In this part we will start setting up a basic turn based system.
Open up the project and add a new button to the scene. Rename it Turn Button and change the text to “End Turn”. Place it anywhere you want on the canvas, however I will be adding mine to the top centre of the screen.


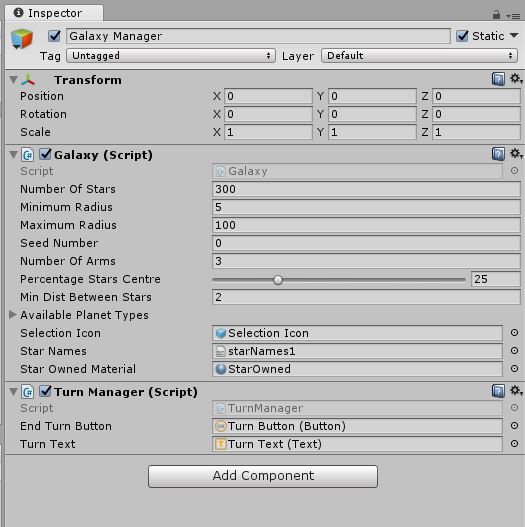
We now need a script to go with this button, so add a new scrip to the Galaxy Manager object (we may make a new object later and change this scripts location) and call it TurnManager.

We will need to make a singleton for this so add an Awake method and a public static TurnManager, called turnManagerInstance, to the script. In the Awake method make turnManagerInstance equal to this.

We can also get rid of the Update method.
Next add a new public void method called EndTurn, it doesn’t need anything passed to it at the moment.

This method will handle all our functions we need to call at the end of the turn, but first we should connect it to the Turn Button. In the Turn Button OnClick menu in the editor add this function.

So what are we going to need to put in the EndTurn method? There will probably be a lot of things by the time we are done with the game, it is going to have to handle all the ship movement, production cues, adding/subtracting resources etc…
Let’s just keep it simple for now. First we should make sure the end turn button can only be pressed once and then the end of turn functions are process (in the future we may make some of these co-routines but for now they will just be standard functions). To do this add using UnityEngine.UI at the top of the script and then add a public button called endTurnButton. Add our Turn Button object in the inspector.


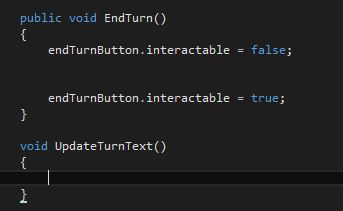
In the EndTurn method make the button un-interactable using the Button.interactable method.

Press return a few times so there are a few lines gap and then make the button intractable again.

Now the button will only be able to be pressed once while all the turn calculations and movements are being made. If we hit play and press the button now nothing really happens though because it is disabling and enabling the button almost instantaneously.
We should add a UI element to show which turn we are on. Add a Text UI element to the scene making it a child of the Canvas. Rename the object Turn Text and set the text to “Turn: 0”. Change the colour to white so it stands out against the black background. Move it anywhere you want on the screen, I am putting mine under the Turn Button. Change any of the other settings to what ever you want and maybe consider putting the text on a panel so it really stands out.


In the TurnManager script add a new public void method called UpdateTurnText. Do not pass it anything.
This method will handle updating the UI text. To do this we need to know what turn we are on and have a reference to the UI. At the top of the class add a private int called turnNumber and a public Text called turnText. In the inspector add the Turn Text object to this slot.

In the Start method make turnNumber equal to zero (this will need to be changed later for when we are loading saved games but it will do for now).

Now in the UpdateTurnText method increment turnNumber by one and set the text equal to “Turn: ” + turnNumber.

Call this method in the EndTurn method just before enabling the Turn Button again.

Great so now we have a turn button and some UI to tell us what turn we are on in our game. Before we end this part of the tutorial we will add a little bit more code in preparation for the next part.
In our PlayerManager script we need to add a public list of owned planets. That way we can easily find all the planets the player owns and loop through them to do things like add production and resources.
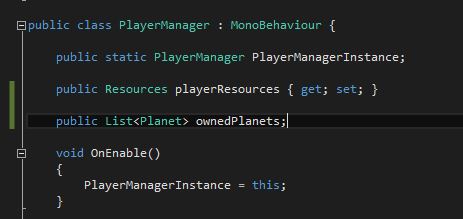
Add an Awake Method to the PlanetManager script and initialise the new list.

Back in our TurnManager script add a new void method called ApplyProduction (no need to pass it anything). Add a for loop in this method for each planet in ownedPlanets.

We will be taking the planets production value and adding it to the first ship in the starbase cue (if the planet has a starbase and has a ship in the cue). See if you can work out how to do this yourself and I will give you the answer next time :).
That concludes this part. In the next part as you probably guessed we will be setting up our ship production cues so that it takes several turns to build a ship.
Scripts (Pastebin)

Thank you Tom. This is a fantastic tutorial. You’re very suited to training, straight to the point, well documented. I look forward to following you through this tutorial.
LikeLike
Hi Nudge, thank you for the feedback 🙂
LikeLike
Shadowplaycoding, thank you so much for posting these tutorials. I find they are better than those found are udemy.com and easier to follow along. Keep up the good work! Looking forward to your next tutorial.
LikeLike
Thank you for the feedback Kilson 🙂 I am glad you are finding them useful
LikeLike