
Hi guys and welcome to part 7. In the last part we made a button which allowed us to get back to our galaxy view after entering the solar system view. Today we will work on a new script to allow us to move the camera around.
Bug Fix
Firstly however you may have noticed a bug where by when you click on a star then back to galaxy view and then click on the same star the planets are in a different place. It seems the solar system has two different planet locations. This is due to the random nature of our angle selection and there is an easy fix for it.
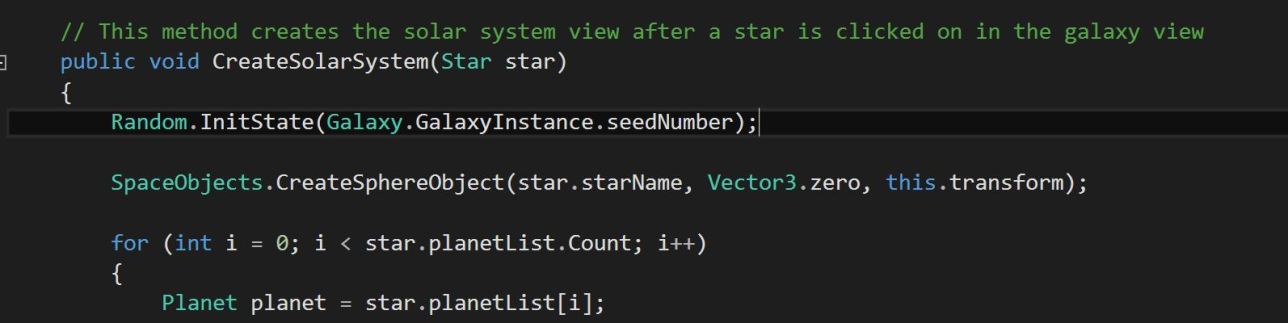
Open the SolarSystem script and in the CreateSolarSystem method add a new line at the top which sets the random state to the same as the Galaxy script’s seedNumber.
The location issue should now be fixed :).
Camera Controller
Before we start coding, this is what I want our camera to do:
- We want it to pan around so we can move around the galaxy.
- Clamp the movement so the camera stops at the edges of the galaxy/solar system.
- We want to be able to zoom in and out so we can have both an overview of the galaxy and see the details on our stars/planets/ships (when we eventually make them interesting).
- When we zoom in and out we want the camera to rotate between a maximum and minimum angle (i.e the camera is at 90 degrees when its fully zoomed out like we have it now and then something like 45 degrees when its fully zoomed in).
I may add some more tutorials on other camera movements if you guys want them. Let me know in the comments :).
In the scripts folder create a new script and call it CameraController. Now in the hierarchy create a new empty object and call it Pan Object. Attach the CameraController script to this object.

- CameraController in Script Folder

Add two more empty objects. Call one Rotation Object and the other Zoom Object. Make Rotation Object a child of Pan Object and Zoom Object a child of Rotation Object. Finally make Main Camera a child of Zoom Object.

Make sure all the objects positions are set to (0,0,0) except the Main Camera. Set that to (0,50,0). Also leave the Main Camera’s rotation as (90,0,0) for now.
Open up the CameraController script. We can delete the Start method as we won’t be using it. However we will be using the Unity built in Awake method so add that instead. The Awake method runs before the Start method.

The script needs to know the transform’s of the Rotation Object and Zoom Object so declare two transforms (name them after the objects). We will set these in the Awake method. Use the Transform.GetChild command to get child 0 (the Rotation Object). Then use it again on the newly set rotationObject Transform to get the Zoom Object’s transform.

Now add a new method called ResetCamera. Make it public and void with nothing passed to it. This method will return the camera to the centre of the galaxy, however later we will probably change this to the players home system. For now all we will do is set the Pan Object‘s position to (0,0,0). Now call ResetCamera in the Awake method.


So now the camera will always start in the centre of the galaxy.
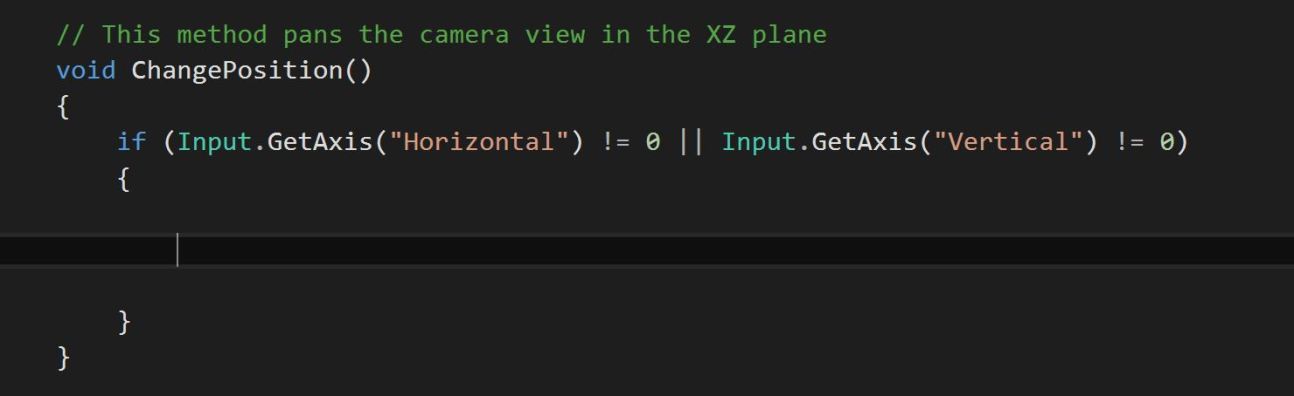
Let’s take care of the panning system first. Add a new method called ChangePosition. Make it void and don’t pass anything to it. We need to use the Input.GetAxis method built in to Unity. To pan we will be using the “Horizontal” and “Vertical” inputs which in unity default to the WASD keys (W and S up and down; A and D left and right). Unity assigns floats to the keys so when the key is not pressed the value is 0 and when it is the value increases to a maximum value. We should only move the camera when the float is not 0. That means adding an if statement. The camera should move if the Horizontal OR the Vertical is not zero so add || between the two conditions.
We need to translate the Pan Object and to do that we need to translate it. To translate something we need a distance and a direction.
How do we know how far to move? Well from basic physics distance = speed * time. We have time from the built in method Time.deltaTime but what do we do for the speed? Let’s declare a new public float at the top of the class called panSpeed. This way you can easily experiment with different values until you find one you like. For this tutorial I will be setting my speed to 100.

Back in ChangePosition in the if statement declare a new float called distance. This will be equal to panSpeed multiplied by Time.deltaTime.

What do we do for the direction? Well we can just make a new Vector3 with the value of the Input.GetAxis (Horizontal for X and Vertical for Z; Zero for Y)

Or can we? There is an issue with this but to demonstrate it we will need to add in our Transform.Translate line and call ChangePosition in the Update method.


Now press play and move the camera around in X and Z. Notice that when moving in a diagonal direction the camera moves faster. We need to normalize the direction Vector3 to stop this from happening. This is very simple as we just add .normalized to the end of the new Vector3.

Now the diagonal movement is working correctly you may have noticed that the camera doesn’t stop moving right away. That’s because it takes time for the input float to get back to zero (it also takes time to reach the maximum value when the button is pressed). We get rid of this by factoring in a damping factor in our translate (declare a float called dampingFactor). The dampingFactor is created by taking the absolute values of both the Horizontal and Vertical inputs. The highest of these two values is used as the dampening factor. This does not completely remove the delay but it makes it much smaller and gives a more smoother movement.
We need to use the Mathf.Abs and Mathf.Max methods for this.

This seems like a good place to finish this part. In the next part we will clamp the panning movement and make a start on the zoom controls.
cameracontroller_endofpart7 (zip file)
